After my last 2 article (Installing VM and Installing OEL 5 ) In this article i will Install Oracle Database 11gR2 last versiyon. Also we need download Oracle Database 11gR2 Click Here and set prerequisite before starting installation.

After copied go to Tmp folder and "unzip" it.

Now its unziped go to /tmp/database/ and
$ ./runInstaller
 We dont need to get support from Oracle that's why i ignored it but if you want to connect and need any support from Oracle enter your available E-mail address.
 So click yes for now
 At this step we see tree installation options so i wanna create with a configuring database, because i would like to show you how to auto create a database after installation.
 Its easy to install on Desktop class Let's Install on Server class.
 We dont need RAC already so choose Single option and click Next
 I prefer to configure Advanced Install. Its up to you select one and click next
 Choose your Language
 Select Enterprise Edtion and Click Next
 Here your Oracle_Base location and Software Location, You can choose install different location but make sure that its same path in Bash_profile.
 Oracle always give you a recomended name and SID however you can change it but again check bash_profile.
 Choose Auto Memory Managment or if you would like to Allocate by yourself then remove the bird on Enable AMM :)

 And at this step asking you Disk Management You can Use ASM Disk, Actually Oracle Recommed us to use ASM Disk but here first i want to use manually file system.
 We dont need any auto backup here we will do it manually by RMAN :)
 Now, 4 important users of oracle password have to be set, Oracle recommend us to using a strong password. I'll give all of them same password thats why i chose the second option and i wrote a special password
 Oracle use Group Click Next
 Now its checking for packages
 So we dont need to install any package. Now there is some physical memory warning however put a bird on "Ignore all" :) and Click Next
 Already we are going to finish, here the response file, what we have done in Click finish


So let's begin.
The first step
Set your preferd host
$ vi
/etc/hosts
127.0.0.1
localhost.localdomain localhost
192.168.192.168 orcl.localdomain orcl
Set the following for some important parameter, Make sure that shmmax is more than shmall.
$ vi
/etc/sysctl.conf
fs.aio-max-nr = 1048576
fs.file-max = 6815744
kernel.shmall = 2097152
kernel.shmmax = 536870912
kernel.shmmni = 4096
# semaphores: semmsl, semmns, semopm, semmni
kernel.sem = 250 32000 100 128
net.ipv4.ip_local_port_range = 9000 65500
net.core.rmem_default=262144
net.core.rmem_max=4194304
net.core.wmem_default=262144
net.core.wmem_max=1048586
After this setting you have to reboot the OS but if you run the following command then you wouldnt need to reboot.
$
/sbin/sysctl –p
Now set the oracle user's limit (the user of OS)
$ vi
/etc/security/limits.conf
oracle soft nproc 2047
oracle hard nproc 16384
oracle soft nofile 1024
oracle hard nofile 65536
Change /etc/pam.d/login file and
add the followingn line:
$vi /etc/pam.d/login
session required pam_limits.so
During installation of OEL i do disabled SELINUX but as i said there you could disabled by the following command.
$ vi
/etc/selinux/config
SELINUX=disabled
Oracle needs some OS packages so mount DVD and install all of them.
cd /media/RHEL_5.5\ x86_64\ DVD/Server/
rpm -Uvh binutils-2*x86_64*
rpm -Uvh glibc-2*x86_64* nss-softokn-freebl-3*x86_64*
rpm -Uvh glibc-2*i686* nss-softokn-freebl-3*i686*
rpm -Uvh compat-libstdc++-33*x86_64*
rpm -Uvh glibc-common-2*x86_64*
rpm -Uvh glibc-devel-2*x86_64*
rpm -Uvh glibc-devel-2*i686*
rpm -Uvh glibc-headers-2*x86_64*
rpm -Uvh elfutils-libelf-0*x86_64*
rpm -Uvh elfutils-libelf-devel-0*x86_64*
rpm -Uvh gcc-4*x86_64*
rpm -Uvh gcc-c++-4*x86_64*
rpm -Uvh ksh-*x86_64*
rpm -Uvh libaio-0*x86_64*
rpm -Uvh libaio-devel-0*x86_64*
rpm -Uvh libaio-0*i686*
rpm -Uvh libaio-devel-0*i686*
rpm -Uvh libgcc-4*x86_64*
rpm -Uvh libgcc-4*i686*
rpm -Uvh libstdc++-4*x86_64*
rpm -Uvh libstdc++-4*i686*
rpm -Uvh libstdc++-devel-4*x86_64*
rpm -Uvh make-3.81*x86_64*
rpm -Uvh numactl-devel-2*x86_64*
rpm -Uvh sysstat-9*x86_64*
rpm -Uvh compat-libstdc++-33*i686*
rpm -Uvh compat-libcap*
Now we have to add Group including user for our database.
groupadd oinstall
groupadd dba
groupadd oper
groupadd asmadmin
useradd -g oinstall -G dba,oper,asmadmin oracle
passwd oracle
And Create folder which is Software will be installed on, and give permissions.
The folder permission is very important other wise you will get error during installation.
mkdir -p /u01/app/oracle/product/11.2.0/db_1
chown -R oracle:oinstall /u01
chmod -R 775 /u01
So User is created and groupadded now log in with Oracle user and Set path installation in bash_profile
$ vi .bash_profile
# Oracle Settings
TMP=/tmp; export TMP
TMPDIR=$TMP; export TMPDIR
ORACLE_HOSTNAME=orcl.localdomain; export ORACLE_HOSTNAME
ORACLE_UNQNAME=ORCL; export ORACLE_UNQNAME
ORACLE_BASE=/u01/app/oracle; export ORACLE_BASE
ORACLE_HOME=$ORACLE_BASE/product/11.2.0/db_1; export ORACLE_HOME
ORACLE_SID=ORCL; export ORACLE_SID
PATH=/usr/sbin:$PATH; export PATH
PATH=$ORACLE_HOME/bin:$PATH; export PATH
LD_LIBRARY_PATH=$ORACLE_HOME/lib:/lib:/usr/lib; export LD_LIBRARY_PATH
CLASSPATH=$ORACLE_HOME/jlib:$ORACLE_HOME/rdbms/jlib; export CLASSPATH
$. .bash_profile And run this command to be setted
Now copy downloaded oracle installation files to the /tmp directory
After copied go to Tmp folder and "unzip" it.
Now its unziped go to /tmp/database/ and
$ ./runInstaller
You can create here with Grid control choosing first option, But i dont need now Select second
option and click next.
Now its creating Database file. it will take some minutes.
So You finished Open a Terminal and run Scripts in order to set location.
Then click OK.
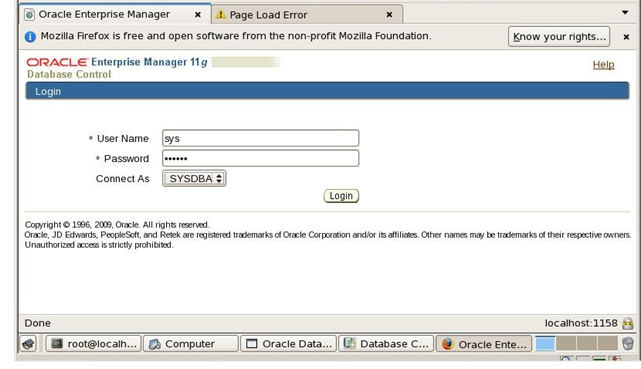
You are successfully done. And you can see the link of Enterprise Manager.
Here we go,I hope it have done useful and i recommend to looking at Oracle-Base Installation.
For more information follow my blogpost and please give me feedback or comment.
Thank you!


